
DM Helpmate
Tutorial: How to add a map
Greetings, friends.
In this first lesson, you will learn how to add a map and do the minimum setup.
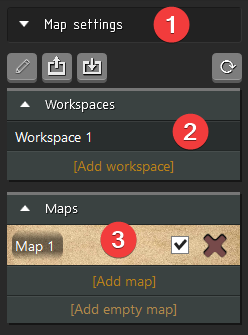
The Map section has a menu where you can switch between tabs. 
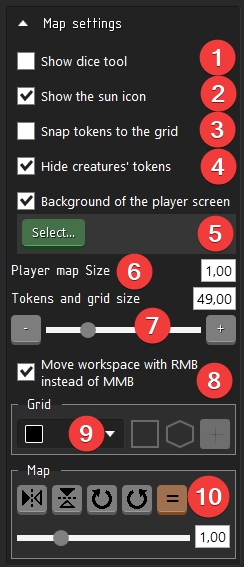
All map settings are in the first tab. Elements have tooltips.
 |
*If the map is animated, there will be just a static picture on the workspace canvas, the video will be played only on the players' screen. |
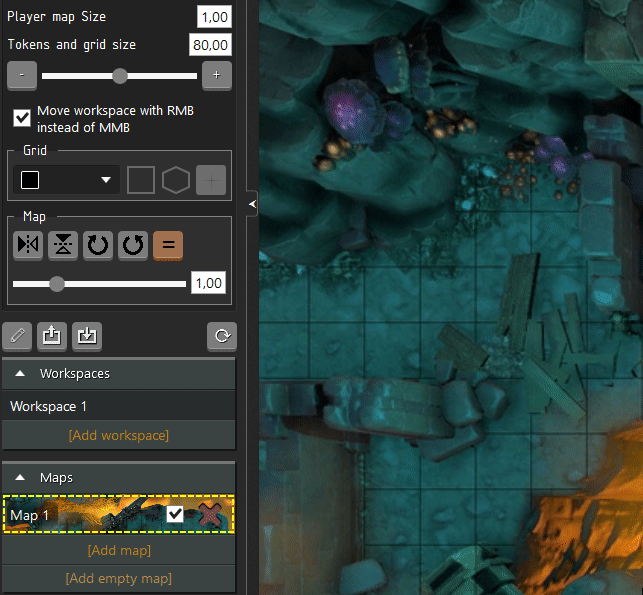
To change the map settings, select it from the map list or click on the map in the workspace. Here's what they do:
 |
|
Let's have a closer look at point 9.
To display the grid, click on one of the three buttons: square, hex, or cross. To remove the grid, click the selected shape again. When the grid is displayed, a special element appears on the map (orange square). You can use it to adjust the desired size and position of the grid.
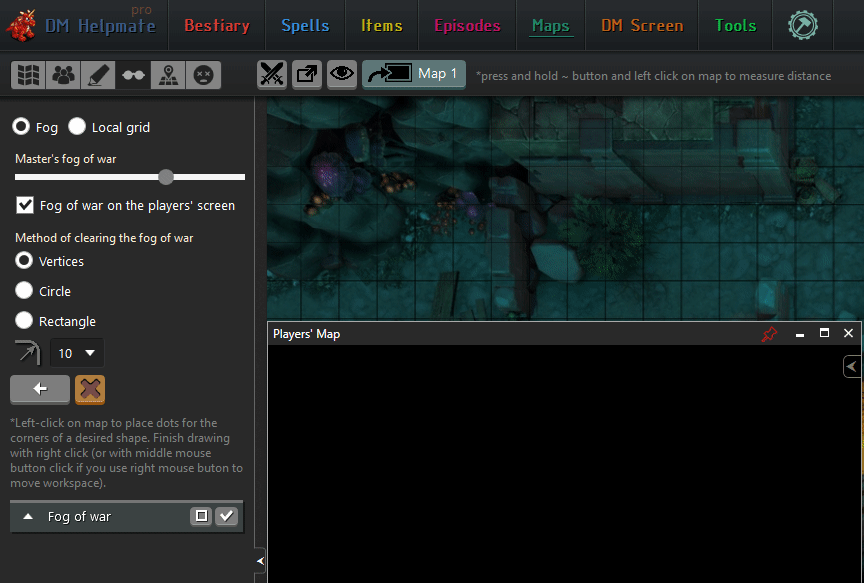
If you play with the second screen or are going to stream a map to the players, you can check how it looks. Make the map active and press the following button with the map's name on it:
After that, an additional window will open and most likely it will be completely black. This is the fog of war. You can temporarily turn off all the fog in the pop-up menu in the top right corner of this additional window: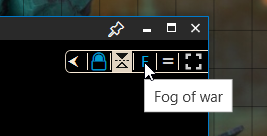
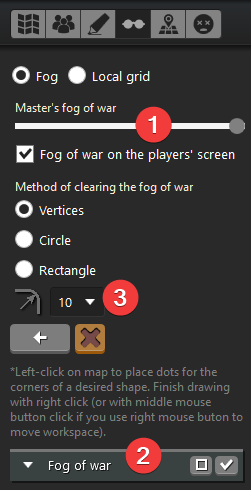
Now let's see how to partially erase the fog. First, open the fourth tab (with the glasses icon).
 |
|
Now select an erasing method. There should be no problems with the rectangle and the circle, so let's talk about the Vertices method. Once you have selected it, start to place dots (vertices), thus creating a figure. You can move the vertices, thus correcting the final result. To finish drawing press either Middle Mouse Button or Right Mouse Button, depending on the map settings.
That's all for now. If you have any questions related to this topic, we will gladly answer them.
Comments
Log in with itch.io to leave a comment.
Thanks for the tutorials. Can the next one you make be on building a simple encounter.
Okay. I will try to make a silent video, it will be faster and perhaps even more understandable for users.